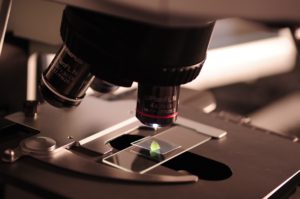
Staining of Fungi Direct microscopic examination without stain lacks sensitivity, especially when hyphae are sparse in the specimen. A variety of differential stains are commonly used like Gram, Giemsa, India Ink Stain, Lactophenol cotton blue stain, etc to stain fungi. To Study Bacterial Staining Technique Click Here Methods of Staining Fungi India Ink stain Introduction This stain was previously known as the “Nigrosin stain”. India ink staining is a negative staining technique used to determine an organism’s cellular morphology. The background is stained whereas the organism remains unstained and the morphology is not distorted in any way. Capsules displace the dye and appear as halos surrounding the organism. This fungi stain provides a high degree of contrast not available in most other staining procedures. This technique is particularly recommended for the demonstration of the capsule of the yeast, Cryptococcus neoformans and it can also be used to demonstrate the presence of bacterial capsules. Method place a drop of India ink on to a clean glass slide Add 1 drop of the specimen or liquid culture or rub a speck of material on the slide surface just beside the ink before mixing it into the ink. Sputum or pus can be cleared with KOH and heat and then mixed with India ink Note: If preparation is too dark, it may be diluted with a small drop of water Place a cover slip over the smear avoiding air bubbles, press it down gently through a sheet of blotting paper so that the film becomes very thin and pale in colour Examine with a high-power lens (phase-contrast microscope) for the presence of encapsulated cells. Bright field microscopy may also be used Interpretation Positive result Organisms possessing a capsule appear highly refractile, surrounded by a clear zone or halo against a dark background. Leucocytes may also appear haloed due to leakage of the cytoplasm but the halo has a fuzzy, irregular appearance at the periphery and the cell within the halo has a paler cell wall. Note: Some Cryptococcus neoformans strains have been reported to be India ink negative. Negative result No clear zone around the organism is observed. Technical information Sensitivity The cryptococcal latex antigen test has been proven to be significantly more sensitive than the India ink preparation and is therefore recommended for the initial diagnosis of cryptococcal disease. Errors with India ink stain Common errors with this stain are: The use of diluted ink. The correct concentration of India ink is critical for showing the capsular zone The smear on the slide is too thick. Some practice is required by laboratory staff in making satisfactory smears Lactophenol cotton blue stain Introduction The lactophenol cotton blue (LPCB) stain is the most widely used staining solution in the examination of yeasts and molds and serves as both a mounting fluid in wet mounts and a stain. It is simple to prepare. The preparation has three components: phenol, which will kill any live organisms; lactic acid which preserves fungal structures, and cotton blue which stains the chitin in the fungal cell walls. Upon the addition of lactophenol cotton blue, fungi stain blue allowing for easier visualization and examination. Other alternative stains that can be used are the Lactofuchsin or aniline blue stains and these have the same principles as the LPCB stain. The Lactofuchsin stain, if performed correctly, can preserve the structure and arrangement of the hyphae, if present for several weeks. Safety considerations Lactophenol cotton blue is acidic while Lactofuchsin is corrosive. They can be toxic if inhaled, in contact with skin and if swallowed. Adhesive tape preparations from fungal cultures must be prepared under a biological safety cabinet to ensure safety of laboratory personnel. Attention must be paid to patient travel history and any suspected Hazard Group 3 organisms must be processed in a Class 1 exhaust protective cabinet in a Containment Level 3 room. Phenol kills any fungus present, allowing the microscope preparations to be examined out with the biological safety cabinet. Skin scraping, Fluid exudate or Tissue Mix the specimen whether a skin scraping, fluid exudate or tissue with two drops of 10% KOH on a clean slide. add one, or at most two drops of the lactophenol cotton blue mountant/stain to the slide Press a cover slip gently to make a thin mount avoiding air bubbles. Gentle warming can also aid in clearing the mount Examine the prepared slide under low power (x10) with reduced lighting. Switch to high power (x40) to check for the presence of suspected fungal structures. Culture If examining a fungal culture, direct microscopic mounts can be made. Alternatively, the adhesive tape method may be used. Direct microscopic mount place one drop of lactophenol cotton blue mountant to a microscope slide using a mounted needle, gently remove a small portion of the colony and place in the LPCB drop cover with a coverslip, pressing gently to make a thin mount avoiding air bubbles blot off any excess LPCB stain examine the prepared slide under low power (x100) with reduced lighting. Switch to high power (x400) to examine the fungal structures in more detail Adhesive tape This technique may be a quick and easy alternative to direct preparation; it often allows fungal structures to remain intact in the slide preparation. There are many variations of this technique; the standard procedure is given below: Place one or two drops of lactophenol cotton blue mountant to a clean glass microscope slide Take a 40mm length of clear adhesive tape and place the sticky side on to the surface of the culture, gently applying pressure allowing fungal elements to become attached to the tape. Forceps may be used. Carefully lift the tape and place on to the LPCB mountant on the slide gently pressing down Note: The preparation may also be examined directly without the use of a coverslip; however, another drop of LPCB stain may be added on top of the tape and a cover glass placed on top examine the prepared slide under low power (x100) with reduced lighting. Switch to
Bacterial Staining Technique: Learning Guide
Staining is a valuable technique used in microscopy to enhance contrast in the microscopic image. Stains are used to highlight structures in clinical specimens, often when viewed with the aid of different microscopes. Stains have different affinities for different organisms and are used to differentiate types of organisms or to view specific parts of organisms. Staining involves the sample preparation onto slides, fixation (which aims to preserve the shape of the cell), the staining with dyes, and the observation under the microscope. Common Errors During Staining Procedure The duration of each step may vary depending on the concentration and formulation of staining solutions and other reagents. Follow the manufacturer’s instructions where possible. Rinsing stepThe use of tap water is not recommended when making the smears or whenperforming rinse steps in some staining protocols, for example, in the Ziehl-Neelsen protocol, Mycobacterium gordonae has been found in tap water and may interfere with the accurate assessment of the specimen to be stained. Deionized or distilled water is recommended.Excess rinsing between steps could also cause error in a staining procedure. Decolourising stepMany laboratories do not adhere to a fixed decolorizing time for staining protocols and so results may vary. In some laboratories, laboratory staff is taught to add the decolorizing reagent drop by drop until it runs clear. Difficulties in interpreting stain resultsThe staining technique is one factor that affects results. This may be due to differences in applying the steps in the protocols which might warrant analysis if problems in interpretation persist. Standardization of the protocols will minimize variation in results. Other issues that may affect results are:• when cultures have not been sufficiently mixed to break up clumps of cells, the resulting smear can be difficult to read because individual cells are not discernible • partially acid-fast bacteria may also contribute to confusion during a smear evaluation• the type and quality of specimen/smear. Smears that are too thick will not be readable and those that are too thin may result in false negatives or result in the need to repeat the procedure• expired reagents• preparation of reagents – this includes confirming the expiration dates ofreagents and confirming protocols to ensure proper reagent concentrations.Difficulty in reading stains can occur when reagents are not prepared to their right concentrations• improper operation of the microscope Bacteria Staining Procedures 1 Auramine-phenol stain – 1 (acid fast bacilli) This staining technique is used to demonstrate the presence of acid-fast bacilli (Mycobacterium species). These organisms have waxy envelopes that make them difficult to stain and decolorize. A fluorescent stain is used in this method. Auramine stain show higher sensitivity and specificity than Ziehl-Neelsen’s method. It is a better method for screening samples from suspected cases of tuberculosis especially pulmonary and extrapulmonary cases where bacilli count is usually low. Method • prepare smear and heat to fix• flood the slide with Auramine-phenol (1:10v/v) and leave for 10min• gently rinse with water (ensure water is either deionized or distilled)• decolorize with 1% acid alcohol for 3-5min• gently rinse with water as above• repeat acid alcohol step until no further stain seeps from the film • counterstain with 0.1% potassium permanganate or thiazine red for 15sec (this ensures a dark background for the fluorescing alcohol and acid-fast bacilli (AAFB) which are easier to see). KMNO4 stains all epithelial cells making it more difficult to see AAFB• gently rinse with water as above and air dry. Do not blot dry• examine slides using ultraviolet epi-fluorescence microscopy at 25 x or 40 x magnification (the use of a 40 x magnification non-cover-glass (NCG) objective lens will avoid the need to apply a cover glass) InterpretationPositive resultAcid fast bacilli vary from 0.5-10µm in length and stain bright yellow-green against a dark background.Negative resultNo fluorescence observed. Non-acid-fast cells appear dark. Quality control organismsPositive controlMycobacterium species.Negative controlA proven negative smear may be used as a negative control. 2 Gram stain The Gram stain is complex and differential staining technique that remains a useful test performed in microbiology laboratories. The staining procedure differentiates organisms of the domain bacteria according to the cell wall structure. Organisms are classified according to their Gram staining reaction – Gram-positive and Gram-negative. The name “Gram” comes from its inventor, Hans Christian Gram. Gram-positive bacteria have thicker and denser peptidoglycan layers in their cell walls. Iodine penetrates the cell wall in these bacteria and alters the blue dye to inhibit its diffusion through the cell wall during decolorization. Gram-positive bacteria must have an intact cell wall to produce a positive reaction. Gram-negative cells which do not retain the methyl/crystal violet are stained by a counterstain. Neutral red, safranin, or carbol-fuchsin may be used as the counterstain. This technique has also been used for staining of certain fungi such as Candida and Cryptococcus which are observed as Gram-positive yeasts. MethodHucker’s modification of Gram staining technique for the examination of smears• prepare a smear and heat gently to fix• flood the slide with 0.5% crystal violet and leave for 30sec• tilt the slide, and rinse slide gently with water• flood on sufficient (1%) Lugol’s iodine (also known as Gram’s iodine) to rinse off excess water, cover with fresh iodine and allow to remain for 30sec• tilt the slide and wash off the iodine with water• decolorize with 95 – 100% ethanol or acetone until color ceases to run out of the smear• rinse with water• flood the slide 0.1% counterstain safranin and leave to act for about 30sec to 1min Note: It can be counterstained for longer if using other dyes, for example,neutral red for about 2min• wash briefly with water and blot dry• examine the slide using an oil immersion objective to observe cell morphology and Gram reaction InterpretationPositive resultGram-positive organisms stain deep blue/purple.Negative resultGram-negative organisms stain pink/red.Note: Other counterstains (such as carbol fuchsin) used may give more intense colours.Quality control organismsA culture containing Gram-positive and Gram-negative organisms may be used for quality control. Common errors in the Gram staining procedureThese are the errors that arise depending on the method and techniques
Minimum Inhibitory Concentration (MIC) Learning Guide
The minimum inhibitory concentration (MIC) is the smallest concentration of an antimicrobial agent that inhibits the growth of bacteria. The value is obtained in a highly mechanized fashion, but this procedure interval-censored reading. It is often of interest to use data collected from complex experiments to see how the mean MIC is affected by different factors. Principles: The Minimum Inhibitory Concentration Assay is a technique used to determine the lowest concentration of a particular antibiotic needed to kill bacteria. This assay is typically performed on planktonic (free-floating) bacterial cells. Methods for determination of MIC: Serial/Broth Dilution method Agar Dilution Method Material used: Laminar air flow Petri dishes Tips Micropipettes Muller Hinton Broth and Agar 1.5% Vortex Mixer Multi-inoculator Procedure: Serial/Broth Dilution Broth dilution testing allows the option of providing both quantitative (MIC) and qualitative (category interpretation) results. MIC can be helpful in establishing the level of resistance of a particular bacterial strain and can substantially affect the decision to use certain antimicrobial agents. Broth dilution can again be performed by 2 ways Macro dilution: Uses broth volume of 1 ml in standard test tubes . Microdilution: Uses about 0.05 to 0.1 ml total broth volume and can be performed in a microtiter plate or tray . The procedure for both macro and microdilution are same except the volume of the broth. For example, let’s say you wish to determine the MIC of an antibiotic on a bacterium. You decide to test 3 concentrations (10 µg/ml, 1 µg/ml and 0.1 µg/ml). Each of these tubes have growth media inoculated with a standard concentration of bacteria and the respective antibiotic concentration (Figure 1). The tubes are allowed to incubate overnight. Broth tubes that appear turbid are indicative of bacterial growth while tubes that remain clear indicate no growth. The MIC of the antibiotic is the lowest concentration that does NOT show growth. After incubating the tubes overnight, you observe the tubes in Figure 2: From this example, Tube C, (with 0.1 ug/ml of antibiotic) did not inhibit bacterial growth. Tubes A and B, on the other hand, did inhibit growth. Tube B has the minimum inhibitory concentration because B is the lowest concentration of the antibiotic that inhibited cell growth. Therefore, the MIC for this bacterium is 1 µg/ml. Agar dilution MIC of an antibiotic using broth dilution method is determined by using the following procedure Preparation of antibiotic stock solution Preparation of antibiotic dilution range Preparation of agar dilution plates Preparation of inoculum Inoculation Incubation Reading and interpreting results Antibiotic stock solution can be prepared by commercially available antimicrobial powders (with given potency). The amount needed and the diluents in which it can be dissolved can be calculated by using either of the following formulas to determine the amount of antimicrobial powder (1) or diluent (2) needed for a standard solution: Prepare antimicrobial agent stock solutions at concentrations of at least 1000 μg/mL (example: 1280 μg/mL) or 10 times the highest concentration to be tested, whichever is greater. Because microbial contamination is extremely rare, solutions that have been prepared aseptically but not filter-sterilized are generally acceptable. If desired, however, solutions may be sterilized by membrane filtration. Dispense small volumes of the sterile stock solutions into the sterile glass, polypropylene, polystyrene, or polyethylene vials; carefully seal; and store (preferably at −60 °C or below, but never at a temperature warmer than −20 °C and never in a self-defrosting freezer). Vials may be thawed as needed and used the same day. Preparation of antibiotic dilution range Use sterile 13- x 100-mm test tubes to conduct the test. If the tubes are to be saved for later use, be sure they can be frozen. Close the tubes with loose screw-caps, plastic or metal closure caps, or cotton plugs. Prepare the final two-fold (or other) dilutions of antimicrobial agent volumetrically in the broth. A minimum final volume of 1 mL of each dilution is needed for the test. Note: For, microdilution, only 0.1 ml is dispensed into each of the 96 wells of a standard tray. Preparation of inoculum Prepare the inoculum by making a direct broth suspension of isolated colonies selected from an 18- to 24-hour agar plate (use a non-selective medium, such as blood agar). Adjust the suspension to achieve turbidity equivalent to a 0.5 McFarland turbidity standard. This results in a suspension containing approximately 1 to 2 x 10^8 colony forming units (CFU)/mL for Escherichia coli ATCC® 25922. Compare the inoculum tube and the 0.5 McFarland standard against a card with a white background and contrasting black lines. Optimally within 15 minutes of preparation, dilute the adjusted inoculum suspension in broth so, after inoculation, each tube contains approximately 5 x 10^5 CFU/mL. Note: This can be accomplished by diluting the 0.5 McFarland suspension 1:150, resulting in a tube containing approximately 1 x 10^6 CFU/mL. The subsequent 1:2 dilution in step 3 brings the final inoculum to 5 x 10^5 CFU/mL. Inoculation Within 15 minutes after the inoculum has been standardized as described above, add 1 ml of the adjusted inoculum to each tube containing 1 ml of the antimicrobial agent in the dilution series (and a positive control tube containing only broth), and mix. This results in a 1:2 dilution of each antimicrobial concentration and a 1:2 dilution of the inoculums. Incubation: Incubate the inoculated tubes at 35 ± 2 ºC for 16 to 20 hours in an ambient air incubator. To maintain the same incubation temperature for all cultures, do not stack microdilution trays more than four high. Interpretation Compare the amount of growth in the wells or tubes containing the antimicrobial agent with the amount of growth in the growth-control wells or tubes (no antimicrobial agent) used in each set of tests when determining the growth endpoints. For a test to be considered valid, acceptable growth (≥ 2 mm button or definite turbidity) must occur in the growth-control well. Quality Control Use reference bacterial strains that are genetically stable and have well-defined MICs that are in the middle range of the expected MICs of each antimicrobial agent to be tested. A dilution series should include at least two concentration
Microbial Bioassay: An Easy Guide
A microbial bioassay is a testing procedure in which the biological activity of a substance or product to stimulate or inhibit the growth of a microbial test organism is estimated. In contrast to common physical or chemical methods, a microbial bioassay results in detailed information on the true activity of a substance. Over the last decade, this type of assays has become increasingly important for quality control and product development. Types of Microbial Bioassay There are two types of microbial bioassay as per USP. Cylindrical Plate Assay Turbidimetric Assay Cylindrical Plate Assay This method depends upon the diffusion of antibiotics through a solidified agar layer in a Petri dish to an extent that the growth of microorganisms is prevented in a circular area known as the zone of inhibition, around the cavity containing antibiotic solution. Turbidimetric Assay The turbidimetric method is a method to determine the antimicrobial potency of an antibiotic, based on the measurement of the inhibition of growth of a microbial culture in a fluid medium. The inhibition of the growth of a test organism is photometrically measured as changes in the turbidity of the microbial culture. Procedure In this article, I will discuss in detail the procedure of the cylindrical plate method of microbial bioassay. Reagents Buffer pH 8.0 Dissolve 1.70gm of KH2PO4 and 0.491gm of NaOH in distilled water and make volume to 500ml with distilled water. Adjust pH with 0.1N NaOH or 0.1N HCl if required. Sterilize this buffer in the autoclave for 15 minutes at 121 C and 15 PSI pressure. Preparation of Innoculum Grow pure organism Staphylococcus epidermidis ATCC 12228 for 18 hours in Antibiotic Agar # 1 pH 6.6 ± 0.1 at 32 — 35°C. This growth is transferred with 3ml sterile saline to the surface of 250ml Antibiotic Agar # 1 pH 8.3 ± 0.1 and incubate it for 24 hours at 32 — 35°C. Prepare the stock suspension by collecting the surface growth in 50ml of sterile saline. Preparation of Standard Dilutions The quantity (mg) of standard is calculated as below and weighed exactly to prepare standard stock solution of 1000 IU / ml. 100,000/ T1 Where T1 = Std. concentration in IU /mg Place the weighed Standard in a 100ml volumetric flask. Add approx. 80ml of sterile phosphate buffer solution pH 8.0 ± 0.1. Mix with a magnetic stirrer and make-up the volume to 100ml with sterile phosphate buffer solution pH 8.0 ± 0.1. Make standard high and standard low dilution as follows. i- Standard High: 1ml stock solution volume to 50 ml with sterile phosphate buffer pH 8.0 (i.e. 20 IU / ml). ii- Standard Low: 0.5ml stock solution volume to 50ml with phosphate buffer pH 8.0 (i.e. 10 IU / ml). Preparation of Sample Dilutions Dissolve equivalent sample powder in 100ml sterile phosphate buffer pH 8.0. Filter stock sample solution after 30 minutes stirring before proceeding for dilutions. Prepare sample high and low dilutions as in case of standard. Preparation of Media Plates Prepare Antibiotic Agar # 1 as directed by the manufacturer in 200ml quantity. Adjust pH to 8.3 ± 0.1 and then divide it into 150ml and 50 ml in the separate flask and then autoclave them. Give base layer by pouring 21 ml each into six sterilized Petri plates with the help of sterile wide tip 25ml pipette let it solidify. Add 0.2ml of prepared organism suspension to 50ml of prepared media while at 45°C swirl to mix suspension evenly and give seed layer of 4ml with the help of a 5ml wide tip sterile pipette. Leave the plates for solidification of the seed layer. Make four cavities 6 — 8 mm with the help of a sterilized borer and spatula and mark as SL, SH, STL, STH. S = Sample ST = Standard L = Low Dosage H = High Dosage Fill cavities by pouring 100µl of prepared low dilution (1 IU / 100µl) and High dilution (2IU / 60ml). Incubation Allow the transferred solution to absorb in the media for 1 — 2 hours then incubate the plates in the incubator at 36 — 37.5°C for 18 hours. Observations After incubation period observe the plates for zones of inhibition Measure the zones on zone magnifier with the help of vernier caliper. Four out of six plates should give reproducible results. Calculations Calculate the content as follows. Potency (%) = Antilog (SH + SL) — (STH + STL) ____________________ x 0.301 (SH – SL) + (STH – STL) x 100
Serial Dilutions: An Easy Learning Guide
Dilution is the process of making a solution weaker or less concentrated. In microbiology, serial dilutions (log dilutions) are used to decrease a bacterial concentration to a required concentration for a specific test method, or to a concentration which is easier to count when plated to an agar plate. I have created this guide to provide a better understanding of dilutions and should be used as a guideline, not a replacement for laboratory procedures. Types of Dilutions Log Dilutions A log dilution is a tenfold dilution, meaning the concentration is decreased by a multiple of ten. To complete a tenfold dilution, the ratio must be 1:10. The 1 represents the amount of sample added. The 10 represents the total size of the final sample. For example, a sample size of 1 ml is added to 9 ml of diluent to equal a total of 10 ml. Example: 1:10 dilution – if the concentration is 1,000 CFU, a one log dilution will drop the concentration to 100 CFU. Multiple Dilutions Multiple dilutions are required to decrease the sample concentration by multiple logs. If the concentration is 35,000 CFU/ml (104), and 35 CFU/ml is the target concentration, the following serial dilutions can be performed. Serial Dilution A serial dilution is the stepwise dilution of a substance in a solution. Usually, the dilution factor at each step is constant, resulting in a geometric progression of the concentration in a logarithmic fashion. Purpose of Serial Dilution Like I mention above A serial dilution is a series of sequential dilutions used to reduce a dense culture of cells to a more usable concentration. Each dilution will reduce the concentration of bacteria by a specific amount. Requirements Sterile Normal Saline Desired Strain (Bacterial culture) Multiple tubes with a screw cap MicroPipette Agar (Tryptic Soy Agar, Selective media) Broth (Tryptic Soy Broth) Precautions Clean and sterilize your work area. Use either disposable inoculation loop or a metal loop that can be heat sterilized to inoculate plates, slants and liquid tubes. If using a metal loop, be sure to cool the loop by touching the sterile cooled liquid media. Procedure Make dilution in the 1st tube by taking 2ml normal saline in a tube and inoculate the desired culture in it. Label 10 tubes and plates as 1,2,3……..,10. Add 9 ml in each test tube. After this, transfer 1 ml (known volume) of the culture from the previously made dilution into the 1st tube having 9ml normal saline. From 1st tube transfer 1ml (known volume) in 2nd test tube and repeat steps till 10th test tube. Discard 1ml from the 10th test tube. After making dilutions, pour 100ul with a pipette from 1st test tube into the respective plate. Repeat this procedure until the 10th plate. After following these steps, pour media TSA or desired media into the plates and let them solidify. Incubate at 35° ±2 in case of bacterial culture and for fungus incubate at 23°±2. Results Observe after 24 hours. Calculations Dilutions are useful in science when making solutions or growing an acceptable number of bacterial colonies to count. There are three formulas used to work microbiology dilution problems: finding individual dilutions, finding serial dilutions, and finding the number of organisms in the original sample. To find a dilution of a single tube, use the formula: sample/(diluent + sample). The sample is the amount you are transferring into the tube, and the diluent is the liquid already in the tube. When you transfer 1 ml into 9 ml, the formula would be 1/(1+9) = 1/10. This could also be written as 1:10. After you have calculated the individual dilutions for each tube, multiply the dilutions when using serial dilutions. Serial dilutions are the culmination of a number of diluted tubes used in order to get smaller dilutions. When a sample diluted 1/100 is added to a sample diluted 1/10, the final dilution would be: (1/100) x (1/10) = 1/1000. Example of Calculation Let’s think through a practice dilution: You will make several dilutions of a bacterial stock culture. For some dilutions, you will add 10µl of the more concentrated solution to 990µl of sterile diluent in a microfuge tube. For others, you will add 100µl of the more concentrated solution to 900µl of sterile diluent. Following is a graphic representation of these dilutions: How did we get to those dilution values? Here is an example: 10µl of sample put into 990µl of diluent gives: 10µl divided by (990 + 10) µl total volume = 10/1000 = 1/100 = 10-2 You plate (put subsamples onto nutrient agar) the following dilutions: (A) 10µl of the 10-3 dilution (B) 100µl of the 10-5 dilution (C) 100µl of the 10-6 dilution (D) 100µl of the 10-7 dilution You incubate the plates for 24 hours, after which you obtain the following results: Plate Colonies on Plate A too many to count B) 685 C) 52 D) 4
Microbiological Testing of Primary Packaging Material
Microbiological Testing is a mandatory requirement to ensure the quality of the packaging material which has a direct impact on the quality of a drug. The goal of the packaging material is to protect the contents against external factors such as humidity, light, oxygen or temperature variations. Microbiological Testing of the packaging material is done to ensure that the product protected against external impacts or not. The packaging material itself should neither interact with the contents of the packaging nor should it have a negative influence on the contents. Ideally, there will also be no transfer of ingredients from the packaging material to the drug. I will elaborate on how to conduct microbiological testing on empty bottles, droppers, and tubes. Procedure The procedure to conduct microbiological testing of the packaging material is as follows. A For Total Microbial Count A.1 Method Applied: Pour Plate A.1.1 Fill each container with peptone and pour the contents in a pre-sterilized flask. A.1.2 Aseptically takes 1ml of the sample from (A.1.1) in each of four Petri plates. A.1.3 Add (15 — 20ml) of liquid trypticase soy agar on the sample’s taken in 2 Petri plates for bacterial growth. A.1.4 Swirl the plate gently, cover, after solidification, invert to remove moisture from the plate and incubate at 30° — 35°C for 3 to 5 days. A.1.5 Similarly repeat the step (A.1.3 — A.1.4) for sabouraud dextrose agar (SDA) in other two plates for fungal growth and incubate at 20° — 25°C for 5 to 7days. Evaluation After completion of incubation, count the colony-forming units taking an average of two Petri plates for each agar medium and record the results. B For Pathogenic Bacteria B.1 Staphylococcus aureus and Pseudomonas aeruginosa B.1.1 Aseptically transfer 10 ml of the sample from (A.1.1) into 90ml trypticase soy broth, disperse and incubate at 30° — 35° for 24 to 48 hours. B.1.2 If growth is present in (B.1.1) mix gently and streak on:- i- Mannitol Salt Phenol Red Agar Medium —— Staphylococcus aureus ii- Cetrimide Agar Medium —– Pseudomonas aeruginosa B.1.3 Cover, invert and incubate the dishes at 30° — 35°C for 24 to 48 hours. Evaluation Examine any resulting growth. Staphylococcus aureus Staphylococcus aureus gives yellow colonies with yellow zones on Mannitol Salt Phenol Red Agar Medium. Then perform a gram staining test. Gram Staining Test: It should be positive cocci in the cluster Confirmation To confirm the Staphylococcus aureus Biochemical differentiation test (API Staph) is performed. Pseudomonas aeruginosa Pseudomonas aeruginosa generally gives green colonies on Cetrimide Agar Medium. If fluorescence is checked in ultraviolet light, it will be greenish. Then perform a gram staining test. Gram Staining test: It should be gram-negative rods. Confirmation To confirm Pseudomonas aeruginosa, Oxidase test is performed. Oxidase test Transfer the colony to be tested to an Oxidase Detection Strip using a platinum wire loop. Spread the culture on the strip and observe for up to 5 seconds. A deep blue / violet color indicates a positive reaction. The presence must be confirmed by API 20 NE (Biochemical differentiation test). B.2 Salmonella Species B.2.1 Aseptically add 10ml of the sample from (A.1.1) in 90ml lactose broth, disperse and incubate at 30° — 35°C for 24 to 48 hours. B.2.2 If growth is present mix gently and pipette 1ml portion into vessels containing 10ml of Selenite Enrichment Broth (double strength) B.2.3 Subculture onto any of two plates of each medium by streaking on. Brilliant Green Agar Medium Xylose Lysine Desoxycholate Agar Medium Bismuth Sulfite Agar Medium Cover, invert and incubate the Petri plates at 30° — 35°C for 24 to 48 hours. Evaluation 1.0 On Brilliant Green Agar Medium Salmonella give small, transparent, colorless or pink to white opaque colonies (frequently surrounded by pink to red zone). 2.0 On XLD Agar Medium, Salmonella gives red colonies that are with or without black centers. 3.0 On Bismuth Sulfite Agar Medium, Salmonella give black or green colonies. Confirmation To confirm Salmonella, transfer the suspected colonies with the help of an inoculating wire to a butt slant of Triple Sugar Iron Agar Medium. A first streak on the surface of the slant. Stabb the wire well beneath the surface of the slant. Incubate at 30° — 35°C for 24 to 48 hours. If the slants become alkaline (red) and butt become acidic (yellow), with or without concomitant blackening of the butt from hydrogen sulfide production, it indicates the presence of genus Salmonella. Confirm the results by using API 20E (biochemical differentiation test). B.3 Escherichia coli Transfer quantity of the contents A.1.1 corresponding to 1gm or 1ml to 100ml of enrichment medium (Enterobacter enrich broth Mossel) and Incubate the (EBM) and remaining lactose broth at 35 — 37°C for 24 to 48 hours. If the growth is present in EBM mix gently subculture on two plates of Levine EMB Agar and incubate at 35 – 37°C for 24 to 48 hours. Evaluation On the Levine EMB Agar, colonies suspected of being Escherichia coli appear greenish metallic sheen in reflected light, dark or even black center in transmitted light. Perform the gram staining it should be gram-negative rods. Confirmation The biochemical differentiation test is performed to confirm Escherichia coli (using the API 20 E system). Requirements A. Total Microbial Count < 50 CFU B. Pathogenic Bacteria Acceptance Criteria Staphylococcus aureus —- No growth Pseudomonas aeruginosa—- No growth Salmonella species—- No growth Escherichia coli—– No growth
Growth Promotion Test: An Easy Guide
Microorganisms require nutrition and artificial habitat to grow in a microbiological laboratory. Nutrition is provided in the form of culture media and other additives. In order to check the effectiveness of culture media, growth promotion test is used. Growth promotion test ensures that culture media is fit for microorganism’s growth or not. Growth promotion test is performed on culture media only. In this article, I will explain how to perform this test in easy steps. Types of Growth Promotion Test Quantitative Analysis Used for the media that is used for enumeration testing Tryptic Soy Agar Sabourad Dextrose Agar R2A Agar Semi-Quantitative Analysis (Agar) Used for selective media Mannitol Salt Phenol Red Agar Cetrimide Agar Triple Sugar Iron Agar Levine EMB Agar XLD Agar Semi-Quantitative Analysis (Broth) Used for media broths Lactose Broth Selenite Cestine Broth Mossel Broth Malachite Green Broth Peptone Tryptic Soy Broth Procedure Test Preparation Prepare culture media as per labeled instructions, in order to check its ability to promote the growth of specific organisms. Prepare culture suspension of specific organisms. Innoculation Inoculate portions of the test culture media in plates, tubes, and bottles with 0.1 ml of specific microbial culture suspension (containing 10-100 CFU). For the selection of organisms and methods of inoculation, see the Table below. Inoculation Method and Culture Media Used Culture Media Test Organism Inoculation Method Tryptic Soy Agar S. aureus (ATCC 6538) B. subtilis (ATCC 6633) E. coli (ATCC 8739) C. albicans (ATCC 10231) Pour Plate Method Tryptic Soy Broth P. aeruginosa (ATCC 9027) S. aureus (ATCC 6538) B. subtilis (ATCC 6633) C. albicans (ATCC 10231) Pour Plate Method Sabouraud Dextrose Agar C. albicans (ATCC 10231) Pour Plate Method Levine EMB Agar E. coli (ATCC 8739) Streaking Use one or more environmental isolates if available, preferably in the media used for environmental monitoring, enumeration test of water and products, etc. Incubation Incubate the inoculated media at recommended temperatures specified for the organism as per Table incubation temperature of test organisms. Incubation Temperature of Test Organisms Test Organism Time Temperature C. albicans (ATCC 10231) 03 days 22.5 + 2.5 °C S. typhi (ATCC 14028) 48 hours 32.5 + 2.5 °C P. aeruginosa (ATCC 9027) 48 hours 32.5 + 2.5 °C E. coli (ATCC 8739) 48 hours 32.5 + 2.5 °C S. aureus (ATCC 6538) 48 hours 32.5 + 2.5 °C B. subtilis (ATCC 6633) 48 hours 32.5 + 2.5 °C Similarly, incubate the un-inoculated media as a negative control for sterility check at a specified temperature for a time specified as per Table above. There should not be present any microbial contamination in the sterility check portions of media by the completion of the incubation period. Result Interpretation Observe and note the result in your relevant notebook. Write the interpretation by comparing the acceptance criteria mentioned in Interpretation Table. Record the details of the growth promotion test, sterility and inhibition tested for each autoclaved media lot as per Table. Perform a growth promotion test on each received dehydrated lot of culture media. Growth should be clear and visible in the form of turbidity in the case of liquid media and distinct colony formation in the case of agar medium. Growth promotion results should be comparable to the previously approved batch of the media. Interpretation Table Media Test Organism Acceptance Criteria Tryptic Soy Agar S. aureus (ATCC 6538) B. subtilis (ATCC 6633) E. coli (ATCC 8739) C. albicans (ATCC 10231) No. of colonies must be within a fracture of two of the no. of colonies on the previously approved medium > 70% recovery Sabouraud Dextrose Agar C. albicans (ATCC 10231) > 70% recovery Tryptic Soy Broth P. aeruginosa (ATCC 9027) S. aureus (ATCC 6538) B. subtilis (ATCC 6633) C. albicans (ATCC 10231) Visible growth should be observed R2A Agar S. typhi (ATCC 14028) E. coli (ATCC 8739) > 70% recovery
Microbiological Testing of Drinking Water
Drinking Water Drinking water safety is a major concern throughout the world. We all are well aware that 90 percent of diseases are water born. Therefore drinking water should be free from pathogens. In this article, I will explain how to test drinking water in a microbiology laboratory. Preparation of Apparatus Thoroughly wash and finally rinsed glass apparatus e.g., Petri dishes pipettes, flasks, graduated cylinders with purified water and sterilized in a dry heat oven at 160ºC for 120 minutes or 170º to 180°C for not less than 60 mins. Filter units are thoroughly washed with purified water and wrapped loosely with Parchment Paper. Filter holders, scissors, forceps, with Parchment Paper, and along with wrapped filter units sterilize by autoclaving at 121°C for 30 minutes. Excessive or prolonged heating will damage the filters. It may be convenient to sterilize all the above equipment and apparatus in a suitable metal container. Procedure Total Microbial Count (Pour Plate Method) Using a sterile pipette, aseptically add 1ml of the sample into two Petri plates (run in duplicate). Aseptically add 20 – 25ml of melted R2A Agar (at about 45°C) in Petri dishes containing water samples. Swirl the plate gently, cover after solidification, invert and incubate at 30 – 35°C for 48 – 72 hrs. NOTE: The test should be conducted under LFC. Evaluation After completion of incubation, count the colony-forming units taking an average of two Petri plates for each agar medium and record the results. Membrane Filtration Method (Alternate Method) The sterilized filter of porosity (0.45mm) is aseptically placed on the filter base of the filtration assembly while the ration unit is attached to a vacuum pump. The membrane is first rinsed with 100ml of sterile Drinking water and then pour 1ml of sample to be tested (diluted sample can be tested if the count is expected). Rinsed the filter membrane again with drinking water after filtration of the sample (in membrane filtration technique for drinking water testing quantity can be increased that is instead of 1ml, 50ml or 100ml can be used, if not very high count is expected). Disassemble the filtration assembly, remove filter aseptically and placed to R2A Agar plate, incubate at 30 – 35°C for 48 – 72 hours. Evaluation After completion of incubation, count the colony forming units (the result evaluation of membrane filtration will be the total count obtained from the single filter membrane). Confirmation If the number of viable micro-organisms increased the alert limit than First Streak the morphologically identical colonies which are more in count on Tryptic Soy Agar and incubate at 30 to 35°C for 24 hours. Perform the gram staining. If morphological identical colonies are gram-negative rods confirm them with biochemical differentiation test (API 20 E & API 20 NE). If the colonies are gram-positive cocci confirm them with API Staph. Pathogenic Bacteria Identification Psudomonas aeruginosa Add 50ml of water to 25ml Malachite Green Broth (Triple Strength). Thus the final concentration of inoculated broth will always be single strength. Incubation at 35°C ± 1°C for 24 – 48 hours. From the incubated Malachite Green Broth, subculture onto the one plate of cetrimide agar. Cover, invert and incubate the dishes at 30 – 35°C for 24 – 48 hours. Examine the resulting growth as following Pseudomonas aeruginosa generally gives green colonies on Cetrimide Agar Medium. If fluorescence is checked in ultraviolet light, it will be greenish. Perform gram staining, it should be gram-negative rods. Confirmation To confirm Pseudomonas aeruginosa Oxidase test is performed. Transfer the colony to be tested to an Oxidase Detection Strip using a platinum wire loop. Spread the culture on the strip and observe for up to 5 seconds. A deep blue / violet color indicates a positive reaction. The presence must be confirmed by API 20 NE (Biochemical differentiation test). Salmonella Species Aseptically add 10ml of the sample in 90ml lactose broth, disperse and incubate at 35 – 37°C for 24 – 48 hours. If growth is present mix gently and pipette 5ml sample with double strength portions into tubes containing 10ml selenite cystine broth in the ratio 1:1, mix and incubate at 35 – 37°C up to 24 hours. Subculture on any of two plates of each medium by streaking. a- Brilliant Green Agar Medium. b- Xylose Lysine Desoxycholate Agar Medium c- Bismuth Sulfite Agar Medium Cover, invert and incubate the Petri plates at 30 – 35°C for 24 – 48 hours. Evaluation On Brilliant Green Agar Medium, Salmonella gives small, transparent, colorless or pink to white opaque colonies (frequently surrounded by pink to red zone). XLD Agar Medium, Salmonella gives red colonies that are with or without black centers. Bismuth Sulfite Agar Medium, Salmonella gives black or green colonies. Perform gram staining; it should be gram-negative rods. Confirmation To confirm Salmonella, transfer the suspected colonies with the help of inoculating wire to a butt slant of Triple Sugar Iron Agar Medium. A first streak on the surface of the slant and then stabbing the wire well beneath the surface; incubate at 30 – 35°C for 24 – 48 hours. If the slants become alkaline (red) and butt become acidic (Yellow), with or without concomitant blackening of the butt from hydrogen sulfide production, indicating the presence of genus Salmonella. Coli Form and E. coli Add 50ml of water sample into a sterile, transparent 100ml tube/flask with a screw cap. Attention: Glass apparatus is not shelf fluorescence. Take one snap pack of media Readycult® Coliforms. shortly tap to ensure the granules are at the bottom. Bend the upper part of the snap pack until at break opens. Attention: Do not touch the opening to avoid contamination risk Add the content to the water sample seal the vessel and shake to dissolve the granules completely (broth is clear & yellowish). Incubate 18 – 24 hours at 35°– 37°C. Interpretation of Results Negative——- No Color Change Total Coli Form—–Color Change to Blue-green (No discoloration with shaking) E. coli——Check blue-green colored vessel for fluorescence by the UV lamp. To
Total Microbial Count Test: An Easy Guide
Total Microbial Count test refers to the counting of viable microorganisms in any dosage form or raw material etc. There are several official methods for conducting the total microbial count test. I will give you a step-by-step guide on performing the total microbial count test in this article. Having a structured checklist can be invaluable to ensure you conduct the Total Microbial Count test effectively and meet all necessary standards. Our Total Microbial Count Testing Checklist provides a detailed guide on required materials, step-by-step procedures, and essential tips to streamline your process. Download it now to simplify your testing workflow and enhance accuracy! Need Step by Step Checklist? Download our free Total Microbial Count Check List Now let us talk about the procedure of conducting this test. There are two official tests for conducting total microbial tests which I think are easy to perform and are cost-effective. Pour Plate Method Here’s how to get started with the Pour Plate Method: And that’s it! You’re ready to observe the microbial colonies. Spread Plate Method The Spread Plate Method is another simple and effective option: After incubation, count the colonies. The results are expressed in colony-forming units (CFU). If no colonies are observed, report the result as fewer than 10 microorganisms per gram or milliliter. Have additional questions? We’re here to help. Let’s talk. Documentation and Reporting of Results Once the test is complete, it’s time to record your findings. Here’s how: Record these counts on the microbiological testing report. Multiply the observed counts by a factor of 10 for final results. For instance, if no growth is observed, you can proudly declare: “Fewer than 10 microorganisms per gram/ml.” Ensuring accurate microbiological testing is essential not only for dosage forms but also for packaging materials, as explained in our article on Microbiological Testing of Primary Packaging Material. Acceptance Criteria for Microbiological Quality of Non-Sterile Dosage Forms To ensure your results meet quality standards, refer to the acceptance criteria for various dosage forms: Total Microbial Count Acceptance Criteria TAMC (cfu/g or cfu/ml) TCYM (cfu/g) Specified microorganisms Non-aqueous preparation for oral use 103 102 Absence of E.coli in 1g or 1ml. Aqueous preparation for oral use 102 101 Absence of E.coli in 1g or 1ml. Oromucosal use 102 101 Absence of Staphylococcus aureus in 1g or 1ml Pseudomonas aeruginosa in 1g or 1ml. Vaginal use 102 101 Absence of Candida albicans in 1g or 1ml Pseudomonas aeruginosa in 1g or 1ml Staphylococcus aureus in 1g or 1ml. By following these steps and maintaining proper documentation, you’re not only ensuring compliance but also contributing to the safety and efficacy of pharmaceutical products. Happy testing!